


Global recession notwithstanding, video surveillance has been the fastest-growing sector in the security industry for nearly a decade, with both private and governmental organisations around the world investing large sums of money.
Several factors drive the explosive growth, and they hinge just as often on cost controls and cost-effective management as they do on the public need for a greater sense of safety in the post-9/11 world. A far cry from the days of closed analogue CCTV systems, today’s digital video surveillance cameras operate over flexible, easily scalable IP networks that authorised users can access in real time from just about anywhere. Using industry-standard, reliable, vendor-independent technology, they are easy and cost-effective to integrate. In today’s network video systems, intelligence resides throughout the system, not least at "the edge” (i.e. in the camera or video encoder) itself, which enables it to determine when and where to send video, at what frame rate and resolution, and when to alert a specific operator for monitoring and/or response. The result: surveillance systems that are cost-effective, future-proof and adaptable to the evolving needs of the installations they serve.
It is, of course, the digital revolution that makes this all possible. And, just as newer, more powerful, more feature-loaded cameras, laptops and mobile phones constantly tempt today’s consumer, the network video market is regularly bombarded with new product offerings that promise ever-greater benefits for the user.
 |
|
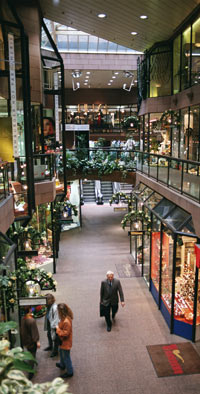
Only by carefully analysing your video surveillance goals can you define the right requirements for your installation. |
Taking the user-centric view
Image quality is often foremost among the touted benefits. Just like their counterparts in the consumer goods market, many of today’s surveillance camera manufacturers are in a race to deliver product with higher and higher image resolution. The supposition is: the higher the number, the sharper the image and the greater the satisfaction for the end-user.
What this approach roundly ignores is the actual needs of the application. Do you want overview surveillance, or detailed images? Will video be viewed live, or logged and stored for months – or even years? IP networks must be able to handle the traffic load of high-resolution video, and storage requirements can quickly expand to terabytes, so these are critical considerations.
Six steps
There are six simple, sequential steps to creating a successful video surveillance solution for the end-user. The first two should precede any equipment, software or systems decisions. The third and fourth should fulfill the decisions made, and the last two take place during the commissioning of the customer’s video surveillance system. The consultant’s or integrator’s professional expertise will determine if everything is done right, and is a valuable safeguard for a cost-effective life-cycle video surveillance investment.
It all starts with a thorough analysis of actual user needs.
1. Goal definition
Only by carefully analysing your video surveillance goals can you define the right requirements for your installation.
Before selecting equipment or systems, the first step is to define how the results will be used. Do you need a general overview of an area or people’s movements, or high detail (facial- or license plate recognition, for example)? Complete installations often include both, so it is important to consider each in its own context to achieve the most effective solution.
No single type of camera is optimal for every application. The best solution often combines HDTV network cameras, megapixel network cameras and standard resolution network cameras that are optimised for different needs – such as pan/tilt/zoom, extreme light sensitivity or cost-efficiency.
To optimise an installation you must also consider the whole system, not just the cameras, because factors like video management software, network capacity and video storage requirements often set limits for image resolution and frame rate.
2. Scene analysis
När de övergripande målen är definierade ska kraven för var och en av kamerornas användningsområden bestämmas. Förutom detaljnivå ska även dessa punkter tas med i analysen:
- Area of coverage
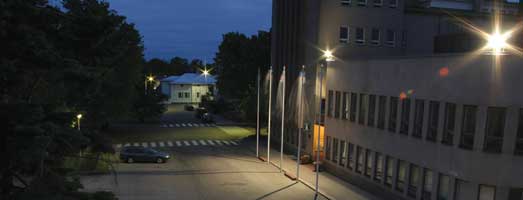
How many ‘interest’ areas need to be covered for a given location. Are they located close together, or far apart? This decides type and number of cameras needed. - Lighting conditions
Most network cameras offer day and night functionality, with some limitations. Is lighting restricted? Is artificial lighting possible? - Indoor or outdoor installation
Ambient light levels may require you to consider day-and-night cameras, or extra lighting equipment, as well as housings that protect cameras against dust, humidity and vandalism. These are critical considerations for outdoor cameras, but can also affect indoor cameras. - Overt or covert surveillance
Clearly visible surveillance cameras can be effective deterrents against potential miscreants, but they can also invite vandalism. Choosing discrete or non-discrete installation affects your selection of cameras, as well as housings and mounts.
Most network cameras offer day and night functionality, with some limitations.
Is lighting restricted? Is artificial lighting possible?
3. Camera selection
The cameras you choose are the major step to completely satisfactory fulfillment of your video surveillance goals. Take time to understand this complex subject area, in order to make the best-informed camera choice.
Image resolution is a critical technical feature of any network camera, and the one that has received the most ‘buzz’ in the past couple of years. From this perspective, there are essentially three categories of network cameras: megapixel, HDTV (high-definition television) and standard resolution (analogue CCTV cameras connected via video encoders fit into this last category too).
Megapixel network cameras are an adaptation of industry best practice, but do not follow any standard. The ‘number’ of megapixels refers specifically to the number of image sensor elements in the camera. Megapixel network cameras can provide extreme image detail, but often at a lower frame rate, and some can even deliver different video streams from different areas of the same image. Good megapixel applications include overview surveillance in banks, transportation hubs and other premises.
HDTV network cameras deliver a pleasing image, with full frame-rate, excellent colour representation and wide-screen (16:9) format. True HDTV cameras fulfill key parts of industry standards such as SMPTE. HDTV is ideal when full frame rate is needed – for airports, casinos, city surveillance and passport controls.
Standard resolution is usually VGA (640 x 480 pixels) or a multiple of it, and is the ‘oldest’ category in the network video surveillance camera market. But its use is still both current and valid: with a powerful optical zoom, a VGA camera fully answers many monitoring needs; in difficult lighting, a VGA camera with extreme light sensitivity and wide dynamic range can outperform both HDTV and megapixel cameras; some VGA cameras provide frame rates higher than 25-30 frames per second – perfect for capturing fast-moving objects.
 |
|
To get the best video surveillance installation, image usability must be the first consideration as well as the litmus test for all other decisions. |
Regardless of category, the following factors are critical, and need to be considered when choosing a camera:
- Frame rate
25-30 frames per second (fps) are the PAL and NTSC standards. Unless an event occurs, 1-4 fps is usually enough for recording purposes - Optics and lens elements
The lens defines field of view, limits light reaching the sensor, and focuses the camera, deciding image quality and supporting the camera’s range of surveillance capability - Light sensitivity
Measure the scene’s luminance under a range of lighting conditions, and then test the camera carefully to make sure it meets your light sensitivity needs. - WDR (Wide Dynamic Range)
WDR makes it possible to handle a wide range of lighting conditions in one scene, by using different exposures for different areas of the same image. - Noise reduction
‘Noise’ can come from the light source, or from sources including the image sensor and other electronic camera components. - Iris control
This is important to image quality. It can be fixed or adjustable. Adjustable-iris lenses can be manual or automatic. - Video compression
This reduces file size and promotes efficient transmission and storage. Make sure standardised compression techniques are employed, to ensure compatibility and interoperability. - Scanning technique
Today, there are two techniques used to read and display video information: interlaced- and progressive scanning. The latter is preferable, as it minimises ‘motion blur’.
4. Camera mounting
Correct camera mounting ensures that image quality can achieve its full potential. Professional expertise is needed to achieve an optimal installation, but here are some factors to consider when planning a camera’s position.
- Surveillance objective
Make sure the camera is right for its task, and correctly positioned to achieve its objective. - Add light, if needed
It is usually easy and cost-effective to add lighting to provide the necessary light conditions to capture good images. - Avoid direct sunlight
This can ‘blind’ the camera and reduce image sensor performance. If possible, position the camera so it is always between the scene and the sun. - Avoid backlight
This problem occurs when capturing a scene in front of a window or a strong source of light. If you can’t reposition the camera, make sure to use a camera that supports wide dynamic range. - Reduce dynamic range
In outdoor scenes, too much sky in the image often causes a high dynamic range. If the chosen camera does not support wide dynamic range, plan to mount it high above the ground. - Adjust camera settings
To obtain an optimal image, it may be necessary to adjust white balance, brightness and sharpness. In low light situations, you must also choose to prioritise either frame rate or image quality. - Legal considerations
Video surveillance may be restricted or prohibited by law. Always check local laws before installing a video surveillance system.
No single type of camera is optimal for every application. The best solution often combines HDTVnetwork cameras, megapixel network cameras, and standard resolution network cameras that are optimised for different needs - such as pan/tilt/zoom, extreme light sensitivity or cost-efficiency.
5. Camera configuration
Configuring means tuning, or fine-tuning, your installed cameras, so you can make the most of them. For example, with the Axis camera range this is easy, thanks to features such as:
- Remote zoom
This allows you to make final adjustments to the zoom from the computer. It helps ensure that the viewing angle is optimised for the scene and required image resolution. - Remote focus
This eliminates the need to manually focus at the camera location. It also allows you to make key adjustments from the computer. - Pixel counter
This enables the installer to draw a rectangle (on-screen) around an area of interest in the scene, to get immediate feedback on the size of that image area and verify that the installation fulfills regulatory or customer requirements for pixel resolution.

How many 'interest' areas need to be covered for a given location? Are they located close together, or far apart? This decides the type and number of cameras needed.
6. Viewing screen calibration
You can only fully appreciate surveillance video when your computer screen or TV is correctly calibrated. Check these four points to ensure your viewing screen is correctly calibrated:
- Brightness
Adjust to suit your personal needs. - Contrast
If contrast is too low, the darker shades in the image will be difficult to differentiate from each other. If too high, lighter shades will be difficult to differentiate. - Gamma
This is a measurement of contrast that affects midtones in an image. Pick the gamma mode that best suits your needs. - Sharpness
Compare the borders between tones in different parts of the image, to decide what sharpness suits you best.
Conclusion
To get the best video surveillance installation, image usability must be the first consideration as well as the litmus test for all other decisions. This is easy to achieve if project development follows the right sequence, and the results will likely be more satisfying and cost-effective too.
About the author and sponsor
 |
Johan Paulsson is Chief Technology Officer of Axis Communications, the global market leader in network video. Employed by Axis since 2008. |
Axis Communications, a Swedish-based company, was first to bring the benefits of network video technology to professional video surveillance and remote monitoring applications, and is driving the ongoing shift from analogue to network video. The world’s first network camera was launched by Axis in 1996. With more than two decades of experience in networking technologies, Axis has the largest installed base of network video products, as well as strong partnerships with leading players in more than 70 countries across all continents. Axis sets great store in a business model that involves working closely with more than 27,000 surveillance channel partners, integrators and consultants around the world.
"The partners we work with will be serving their customers for years to come, so it’s critical to them to provide surveillance solutions that fully respond to customers’ wishes and defined needs, and that are effective, reliable, cost-efficient and future-safe. Our continuous dialogue with partners, as well as end users, motivates a slightly different take on image quality: image usability,” says Johan Paulsson.
"Image quality is critical, of course, but the actual benefits you derive from video surveillance will depend to a very large degree on how you use your images. That’s why Axis focuses on ensuring that video can be optimized for the purposes each installation requires, so both our partners and the end users can benefit fully, ” Johan Paulsson concludes.
Founded in 1984, Axis is listed on the OMX Nordic Exchange, Large Cap and Information Technology.
For more detail, view an in-depth presentation of the Axis take on image quality at: www.axis.com/imageusability


 Global